Vue的作用域插槽
作用域插槽(Scoped Slots)是Vue的一个很有用的特性。可以使组件更加通用和可复用。唯一的问题是他们很难理解!试图让你围绕着整明白父和子作用域的交织关系,就像是解决一个棘手的数学方式程一样。
当你理解不了的时候,最好的一个方法就是试着用它来解决问题。在接下来的内容中,这篇文章将向大家演示如何使用作用域插槽来构建可重用的列表组件。

基本组件
我们将要构建的组件叫做my-list,这个组件的功能就是显示一些列表。其特别之处就是,组件每次自定义使用中如何呈现列表项。
让我们先来处理最简单的用例,得到一个my-list组件,只呈现一个列表:一系列的几何形状名称和它们对应的边数。
使用Vue.component()注册一个组件。并且我们创建这个组件的时候采用的是x-template语法方式。如果你在本地创建了Vue的项目,那么你可以在app.js文件中添加下面的代码。(我在Codepen上写这个示例,下面的代码放在JavaScript中):
// app.js
Vue.component('my-list',{
    template: '#my-list',
    data () {
        return {
            title: 'Shapes',
            shapes: [
                {
                    name: 'Square',
                    sides: 4
                },
                {
                    name: 'Hexagon',
                    sides: 6
                },
                {
                    name: 'Triangle',
                    sides: 3
                }
            ]
        }
    }
})

let app = new Vue({
    el: '#app'
})
然后在index.html添加对应的模板(Codepen上对应的HTML项):
<script id="my-list" type="text/x-template">
    <div class="my-list">
        <div class="title">{{ title }}</div>
        <div class="list">
            <div class="list-item" v-for="shape in shapes">
                <div>{{ shape.name }} <small>({{ shape.sides }} sides)</small></div>
            </div>
        </div>
    </div>
</script>

<div id="app">
    <my-list></my-list>
</div>
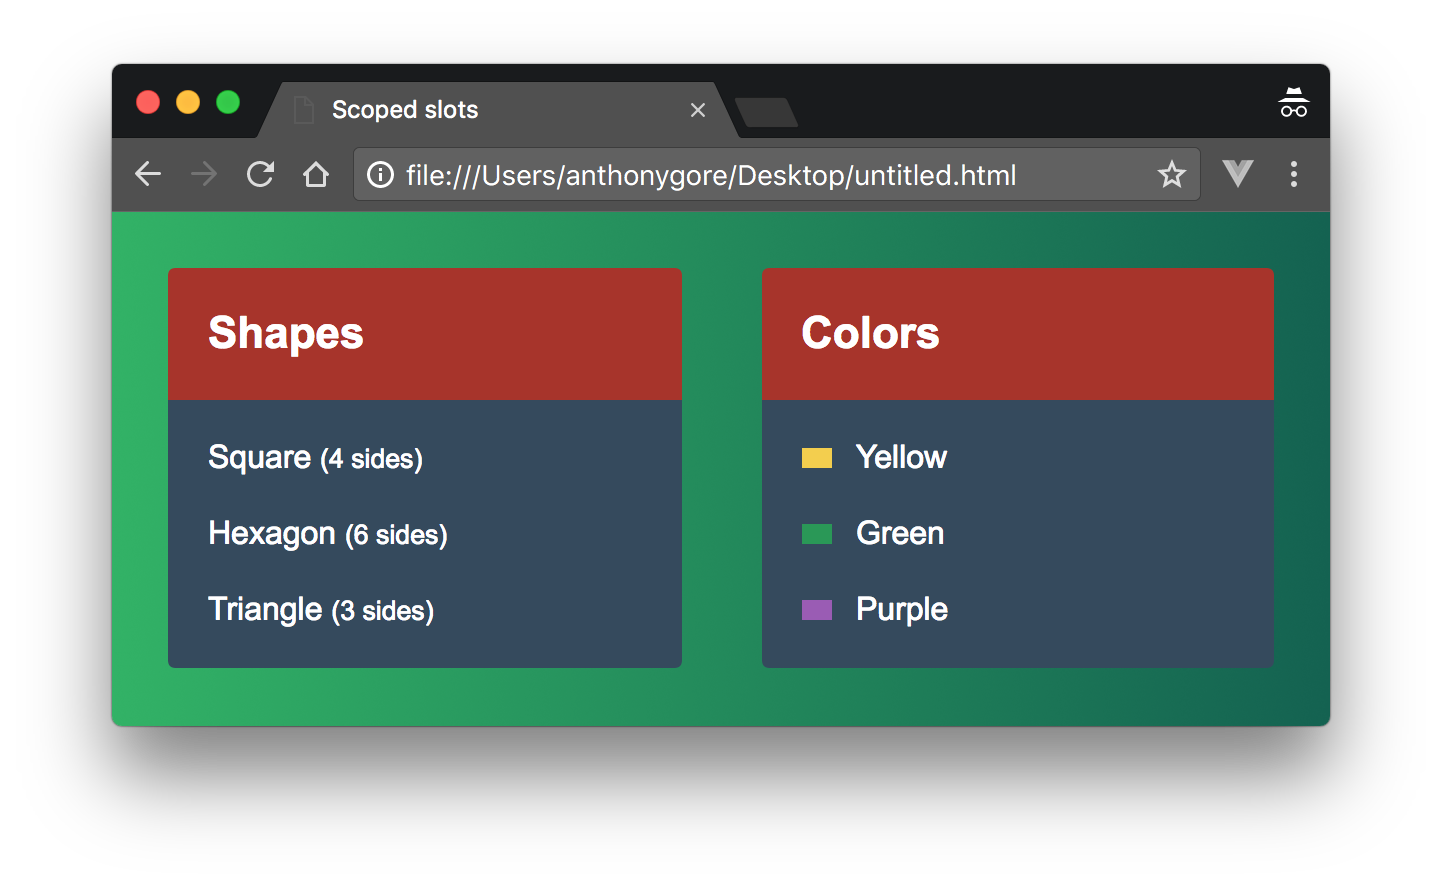
添加一些CSS,你将看到这样的效果:
扩展 my-list
现在,我们要使用my-list功能更全面,足以呈现任何类型的列表。我们要写的第二个测试用例将是一个颜色列表,包括一个小的swatch,以显示颜色的外观。
要做到这一点,我们必须抽象出data中任何指定的图形列表。由于我们的列表中的项可能有不同的结构,所以我们将给my-list添加一个插槽,这样父类就可以定义如何显示特定的列表。
// app.js file
Vue.component('my-list',{
    template: '#my-list',
    props: ['title']
})

// index.html
<script type="text/x-template" id="my-list">
    <div class="my-list">
        <div class="title">{{ title }}</div>
        <div class="list">
            <slot></slot>
        </div>
    </div>
</script>
现在,让我们根据根实例创建my-list组件的两个实例,以显示我们的两个测试用例的列表:
// app.js file
let app = new Vue({
    el: '#app',
    data () {
        return {
            shapes: [
                {
                    name: 'Square',
                    sides: 4
                },
                {
                    name: 'Hexagon',
                    sides: 6
                },
                {
                    name: 'Triangle',
                    sides: 3
                }
            ],
            colors: [
                {
                    name: 'Yellow',
                    hex: '#f4d03f
                },
                {
                    name: 'Green',
                    hex: '#229954'
                },
                {
                    name: 'Purple',
                    hex: '#9b59b6'
                }
            ]
        }
    }
})

// index.html
<div id="app">
    <my-list title="Shapes">
        <div class="list-item" v-for="shape in shapes">
            <div>{{ shape.name }} <small>({{ shape.sides }} sides)</small></div>
        </div>
    </my-list>

    <my-list title="Colors">
        <div class="list-item" v-for="color in colors">
            <div>
                <div class="swatch" :style="{ background: color.hex }"></div>
                {{ color.name }}
            </div>
        </div>
    </my-list>
</div>
最后的效果如下:
组件外表
前面组件工作得很好,但是代码并不太好。my-list是一个显示列表的组件。蛤我们必须抽象出列表,用来呈现父类的所有逻辑。组件仅用一些标签来包裹列表。
考虑到组件声明中仍然有重复的代码,比如<div class="list-item" v-for="shape in shapes">等。如果我们可以将其委托给组件,那就太好了,这样我们的组件就只仅仅在表面上。
作用域插槽
为了让我们做到这一点,我们将使用作用域插槽而不是常规的插槽。作用插槽允许你将模板传递给插槽,而不是传递一个已呈现的元素。它被称为作用域的插槽,因为尽管模板在父范围内呈现,但它可以访问某些子数据。
例如,具有作用域插槽的子组件看起来像下面这样:
<div>
    <slot my-prop="Hello from child"></slot>
</div>
使用此组件的父节点将在插槽中声明一个模板元素。这个模板元素将拥有一个属性范围,名称是一个别名对象。添加到插槽中的任何props都可以作为另外对象的属性使用。
<child>
    <template scope="props">
        <span>Hello from parent</span>
        <span>{{ props.my-prop }}</span>
    </template>
</child>
渲染出来像这样:
<div>
    <span>Hello from parent</span>
    <span>Hello from child</span>
</div>
在my-list中使用作用域插槽
我们将列表数组作为props传递给my-list。然后我们可以用一个作用域插槽来替换槽。这样,my-list就可以负责迭代列表项,但是父类仍然可以定义每个列表应该如何显示。
// index.html
<div id="app">
    <my-list title="Shapes" :items="shapes">
        <!-- 模板写在这 -->
    </my-list>

    <my-list title="Colors" :items="colors">
        <!-- 模板写在这 -->
    </my-list>
</div>
现在,我们得到一个my-list来遍历数组项。在v-for循环中,item是当前列表的别名。我们可以创建一个插槽,并使用v-bind="item"将列表项绑定到插槽中。
// app.js file
Vue.component('my-list', {
    template: '#my-list',
    props: ['title', 'items']
})

// index.html
<script type="text/x-template" id="my-list">
    <div class="my-list">
        <div class="title">{{ title }}</div>
        <div class="list">
            <div v-for="item in items">
                <slot v-bind="item"></slot>
            </div>
        </div>
    </div>
</script>
注意,如果你之前没有使用过任何参数的
v-bind,那么这将把整个对象的属性绑定到元素上。这对于作用域插槽非常有用,因为你所绑定的对象通常具有任意的属性,这些属性现在不需要按名称来指定。
现在,我们将返回到我们的根实例,并在my-list的插槽中声明一个模板。首先看一下shapes列表,模板必须包含我们指定的别名shape范围属性。这个别名允许我们访问作用域的props。在模板内部,我们可以使用与之前相同的标记来显示我们的shape列表项。
<my-list title="Shapes" :items="shapes">
    <template scope="shape">
        <div>{{ shape.name }} <small>({{ shape.sides }} sides)</small></div>
    </template>
</my-list>
现在完整的模板如下:
<div id="app">
    <my-list title="Shapes" :items="shapes">
        <template scope="shape">
            <div>{{ shape.name }} <small>({{ shape.sides }} sides)</small></div>
        </template>
    </my-list>
    <my-list title="Colors" :items="colors">
        <template scope="color">
            <div>
                <div class="swatch" :style="{ background: color.hex }"></div>
                {{ color.name }}
            </div>
        </template>
    </my-list>
</div>
总结
尽管这种方法使用的标签和以前一样的多,但它已经将公共功能委托给组件,这使得设计更加健壮。
以下是组件的完整的代码:
本文根据@ANTHONYGORE的《Getting Your Head Around Vue.js Scoped Slots》所译,整个译文带有我们自己的理解与思想,如果译得不好或有不对之处还请同行朋友指点。如需转载此译文,需注明英文出处:https://vuejsdevelopers.com/2017/10/02/vue-js-scoped-slots。
如需转载,烦请注明出处:https://www.w3cplus.com/vue/vue-js-scoped-slots.html


